Guide: Create this Website.
Small Beginnings #
Wanted to create a personal website that I could use to post projects and ideas. Thought I would create this guide on how I created this website and my perimeters around using services to help with the hosting an management of the site.
Constraints: #
- Cheap. $10 a year. 💵
- Secure. (Not self hosted) 🔒
- Easy to Build.
- Minimalist.
- Updates via any device (Mac / iOS)
- Analytics 📊
Steps: #
1.) Register a Domain #
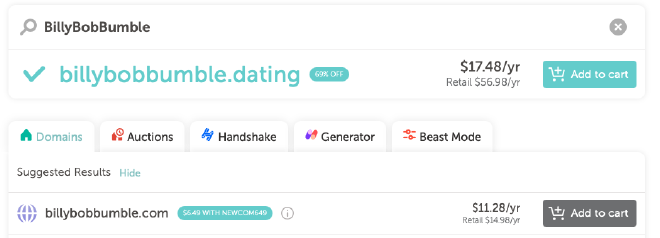
You will need your website name. e.g.: rylandwemlinger.com If you already have on, you can skip this step. I used NameCheap as they are as their name implies…..cheap. At the time of this post you can get a a domain the first year for under $10. In the Example below use the code: NEWCOM649 at checkout.
2.) Setup Hugo #
Hugo is an open source website generator that generates a complete website from a collection of files without the need of databases or server side processing. So its fast, easy to host and secure.
A.) Install on Mac #
Open Terminal and Copy the code below: (Space bar + CMD)+ Term + Enter
/bin/bash -c "$(curl -fsSL https://raw.githubusercontent.com/Homebrew/install/HEAD/install.sh)"
echo 'eval "$(/opt/homebrew/bin/brew shellenv)"' >> ~/.zshrc
eval "$(/opt/homebrew/bin/brew shellenv)"
Make Sure HomeBrew Installed Correctly:
brew --version
Install Hugo:
brew install hugo
That’s it, you officially installed Hugo and can compile websites on your local machine! Lets start a new website with the following command:
hugo new site Website
cd mywebsite
git init
git submodule add -b stable https://github.com/jpanther/congo.git /themes/congo
git submodule update --remote --merge
cp -r themes/congo/ Website/
cp Website/exampleSite/content/_index.md Website/content/
3.) Setup Obsidian #

Obsidian is a multi-platform secure notes taking app. It has full markdown support and offers a ton of features for free. It creates a “vault” locally which can be synced via cloud site like iCloud. Best of all it has community based plugins that will allow additional functionality. We are going to install and setup the vault that will be used to manage our website directory. Then we will install a Github plugin to automatically update GitHub with our collection of website data.
Note: If you want to manage Obsidian from an iOS device, I would download the app and setup the vault for iCloud. This option will let you sync the vault back to your Mac.
Download on iOS: https://apps.apple.com/us/app/obsidian-connected-notes/id1557175442
Mac Download: https://obsidian.md/download
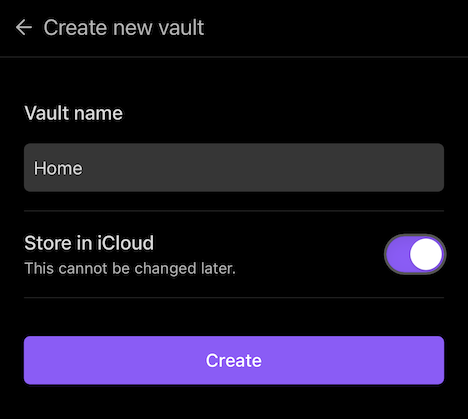
Once Obsidian is installed, name your Vault and click “Store in iCloud”

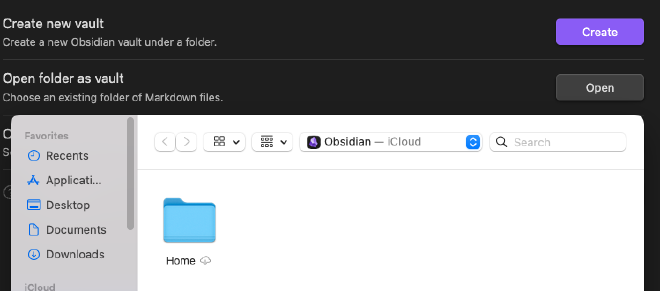
This will create an obsidian folder in your iCloud to sync your Mac to. Once created you Can jump back to your Mac and install Obsidian. Launch Obsidian and choose Open folder as Vault. Go to your iCloud Drive and find the Obsidian folder and select the folder that is the same name as your iOS Vault:

Select the folder and click continue. Click on Trust Author and Enable Plugin. Thats it you have successfully created your Obsidian Vault. Next we will jump back to Hugo to create the website documents which will be stored in your new Obsidian vault.
Uninstall Homebrew
/bin/bash -c "$(curl -fsSL https://raw.githubusercontent.com/Homebrew/install/HEAD/uninstall.sh)"
Published in St. Louis
